Page 5 of 80
Re: James 85 Z31 300zx
Posted: Wed Jul 28, 2010 9:34 pm
by 85_Z31
Well I'm still waiting for the Turbo to be finished, the machinest hoped to have it done by tonight but he has had problems with the carbide cutting tips he is using.
So with all this downtime and so much energy I decided to make a "super Intake Pipe"
So far i have done this with some offcuts and $15 of unwanted mandrel bend sections from the exhaust shop.
Welding this is going to be a bitch because my welding isn't great and the metal is thin.
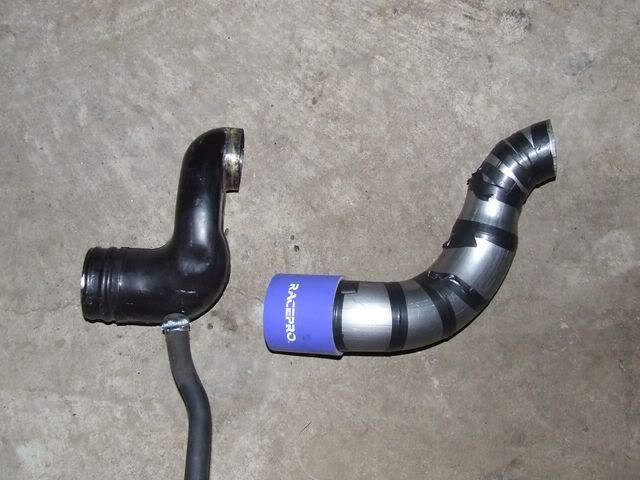
The factory Right Angle Bend.....qualiy........


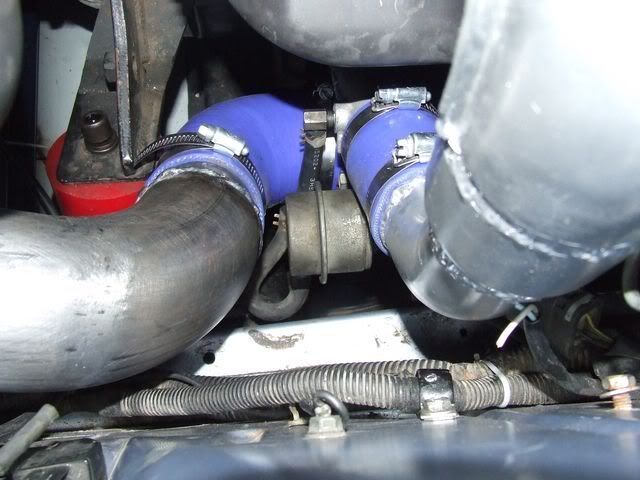
And the mock up of the super intake bend. ( still needs some tweaks to get it to fit but you can see it steps down smoothly from 3" to 2.5" and then onto the turbo
And a comparison of both.
Re: James 85 Z31 300zx
Posted: Wed Jul 28, 2010 11:15 pm
by my1200
looks sweet bro, turn down ya heat and the welds should be sweet as!
Re: James 85 Z31 300zx
Posted: Thu Jul 29, 2010 8:06 pm
by 85_Z31
Well you guys already know that my big flash turbo didn't work at all so here is the modified turbo i have been promising.
I really want my car going so I'm less concerned about making power than just having a nice but fairly quick street car
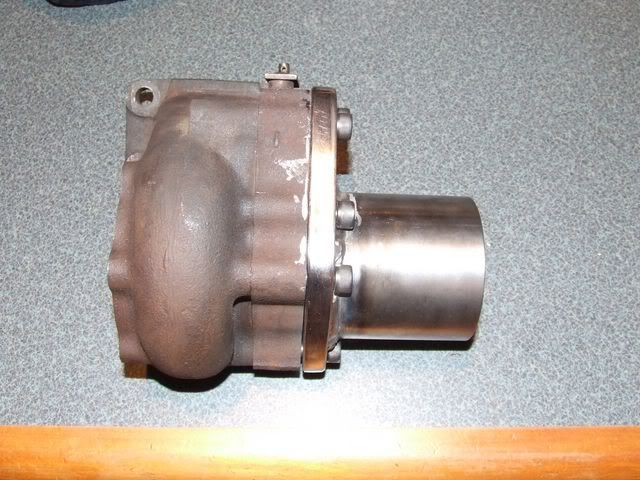
I'm not made of money so i chose to do something to my Factory T3 to improve the flow from the exhaust housing. I will probably have this turbo rebuilt as a t3/t4 at a later date since I already have the t4 front cover and compressor wheel from the turbo which nearly cooked itself.
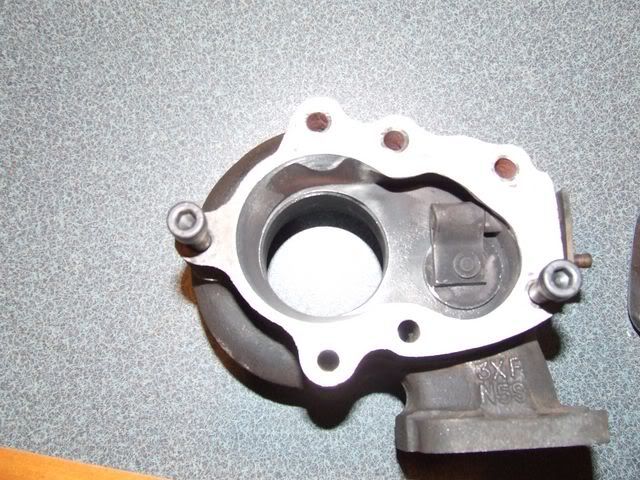
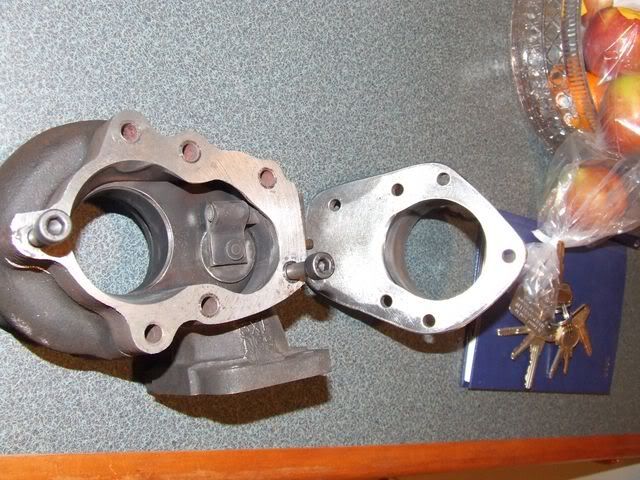
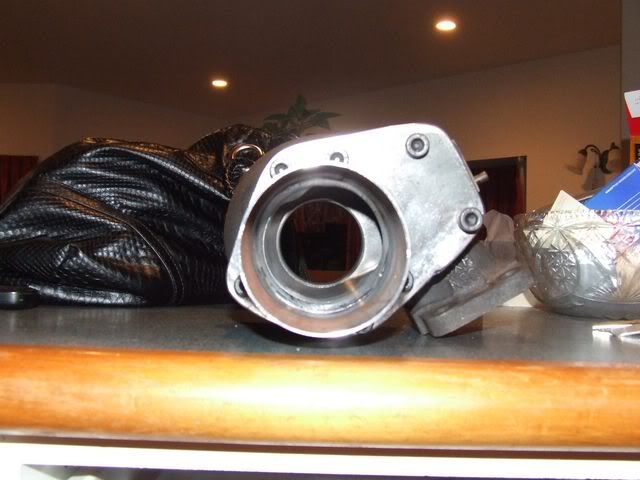
Step 1 was to hacksaw off the horrendous cast rear elbow > see last pic for an OEM disgusting one
Step 2 was to fully disassemble the turbo so that the turbine housing could be put on a 3 jaw chuck on the lathe
Step 3 is to machine all the crap off the waste gate flange to give us something clean to work with
Step 4 once the waste gate housing was fully machined smooth was to slowly taper the flange outward to the edge
Step 5 was to make up a new flange to bolt on top of the waste gate flange which would allow us to merge the OD all the way out to 76mm or 3" to allow a really smooth flowing rear housing.
Step 6 was to weld a stub onto the new flange to allow for the making of a fully custom high flow down pipe.
Step 7 is to build the rest of the exhaust which I have already done, if you want to see what that looks like scroll up a bit
This is a far superior to a stock t3 and will flow a shit load better without the dog shit rear housing/elbow
300whp should be easily achievable Keep in mind my engine has a performance valve job, Kelford Cams, ported and flowed heads , Nistune engine management 440cc injectors and now there will be zero parts of the exhaust smaller than 3"
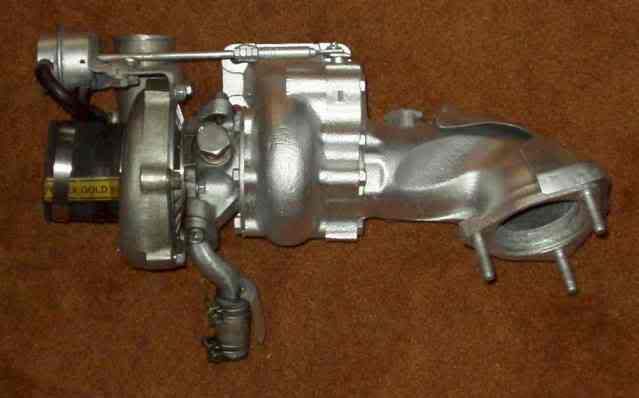
and here is the master piece
and compared to a random internet pic of a normal t3 you can see straight away what we have done is going to help a lot
Re: James 85 Z31 300zx
Posted: Thu Jul 29, 2010 9:47 pm
by dirtyleppa
wow, what a difference man, you got some pretty good skills there dude
Re: James 85 Z31 300zx
Posted: Fri Jul 30, 2010 12:44 pm
by 85_Z31
Ah, I Can't take credit for the lathe work, i fully rebuilt the machinst's laptop and Other computer so it worked nicely both ways.
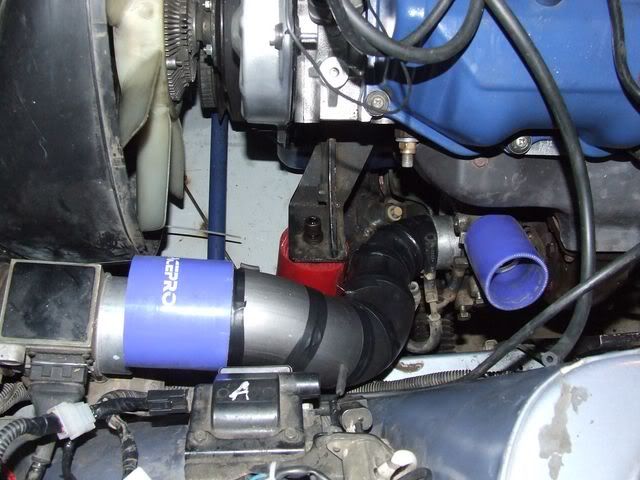
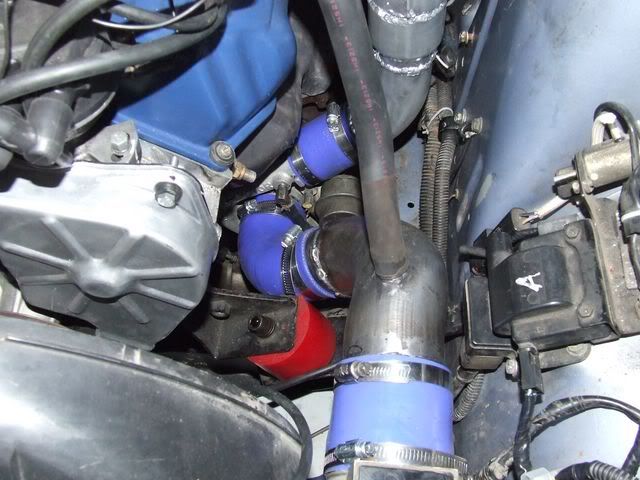
well Here is the finalised version of the intake pipe, the 90deg blue pipe works perfectly and allows that wee bit of flex so that the engine can rock on its mounts a tiny bit.
I think it came out Great
Edit > my 90 bend arrived in the mail so i quickly threw it together for a proper test fit
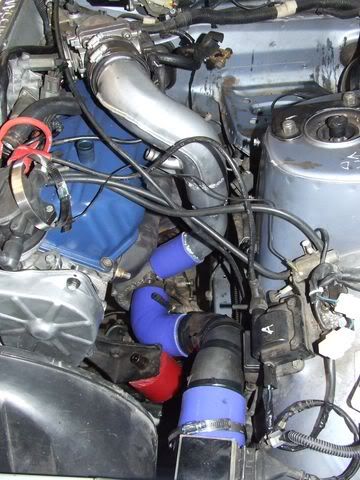
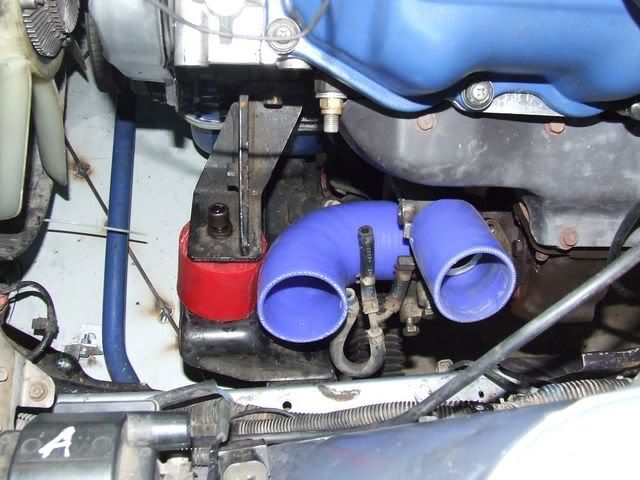
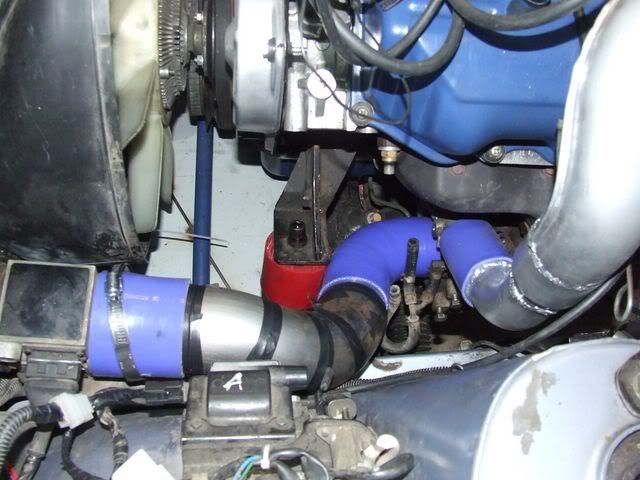
I think I could do with spacing up the MAF( Mass Air Flow ) sensor on its mounting base perhaps 1/2 and inch, then it might not rest on the Map Sensor for the boost gauge so much.
I think it came out great > Now onto welding
Re: James 85 Z31 300zx
Posted: Fri Jul 30, 2010 12:47 pm
by 85_Z31
Regarding Mad Skillz

anybody can do this stuff. Talk to some guys about how to do it and just go nuts.
The only stuff I use for all this pipe work is a bench vice, a hacksaw a rough, medium and fine file and just some imagination
I do have access to a Mig welder but my welding is shit but i need to practice and this is a good project for that.
Re: James 85 Z31 300zx
Posted: Fri Jul 30, 2010 1:03 pm
by datsunboy
are you going to be using the factory wastegate still?
It looks like youve greatly imporved flow from the turbo, but restricted the wastegate bypass flow
Re: James 85 Z31 300zx
Posted: Fri Jul 30, 2010 6:12 pm
by 85_Z31
With the factory waste gate housing its doing exactly the same as what we have done so that part of it is to stay the same.
I don't really want to run a divided setup as when I finish the headers from earlier in my build I am going to incorporate a really smooth external waste gate setup.
BTW that Dyno graph just up a little bit was done on an ugly stock Waste gate assembly and cast iron dump pipe, you can see from my earlier attempt that going with the divided setup is my preferred method but as I'm going headers and external waste gate it would mean having to re make the flange and exhaust for a THIRD time which is totally not cool.
My turbo engineer says its just fine like that, not ideal but its not going to hurt the other improvements we have made.
Re: James 85 Z31 300zx
Posted: Wed Aug 04, 2010 12:48 pm
by 85_Z31
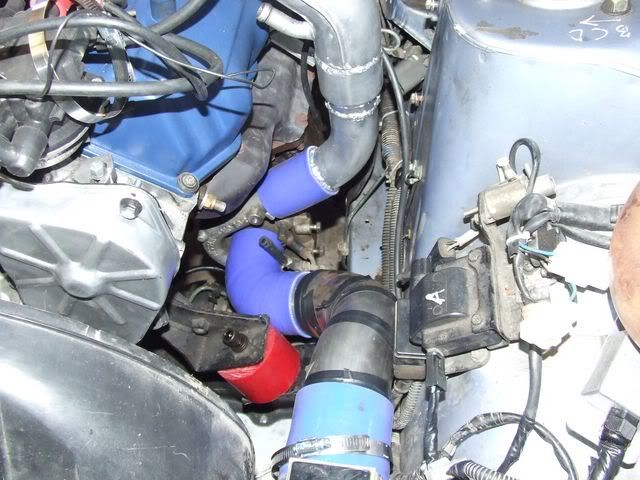
Bit of an update
I found a problem when i attached my Intake Pipe as it fouled on the waste gate actuator, I will get pics of it later so what i have done is drilled 2 new mounting holes in the wastegate actuator bracket so it can move approx 12 -15mm further towards the firewall this then allows plenty of room for the intake pipe.
On the intake pipe I did ovalise it a tiny wee bit just to allow clearance from rubbing on the engine mount & wastegate actuator.
Its pulling a bit towards the front of the car as I need to extend the piece of pipe at the end which goes into the air flow meter, this should keep it nicely in the gap and have no issues rubbing against the engine mount or the waste gate actuator
Its been a pain in the ass but when painted it will look the business and should perform well
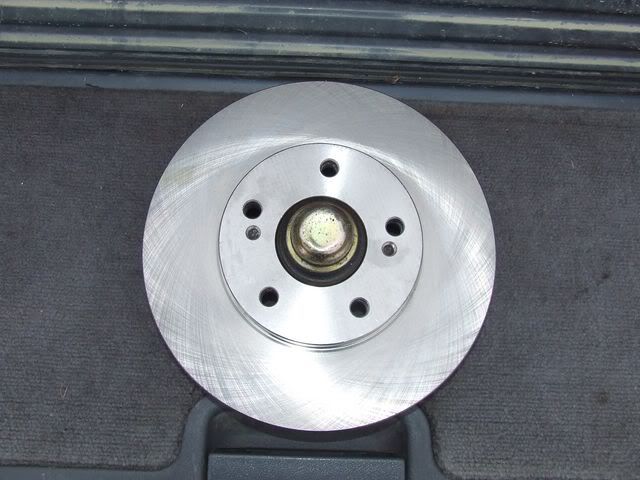
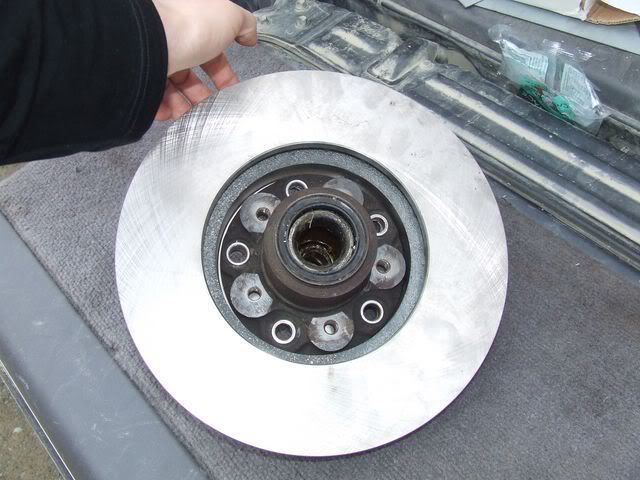
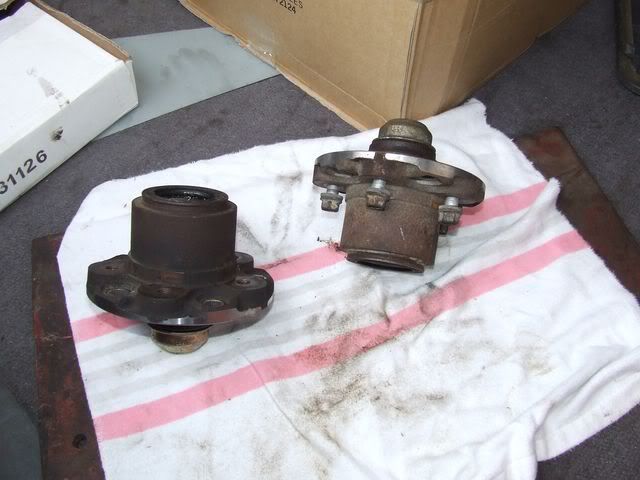
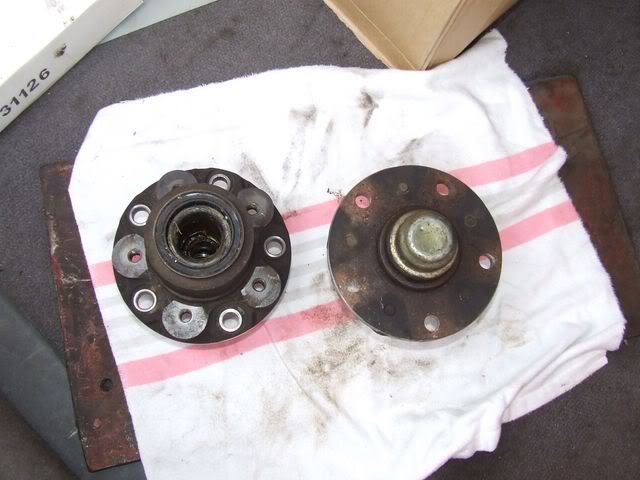
And for Brake Upgrade Stuff,
these areZ31 1985T 5 stud turbo hubs machined down to accept an R32/Z32 30mm Rotor, I believe the longer wheel studs shown are z31 1988 rear wheel studs I sourced these from the USA as they were amazingly good value compared to Repco & other places
( In NZ wheel studs for a Z31 are like $20 each )
the way they are currently the rotors have a bit much float, I will have a alloy shim made up so that its all nice and hubcentric so there are no problems with getting a Certification
At a later date I will get some wheel spacers to allow me to use my stock 85T wheels, I do have other wheels But I would like the option of factory wheels fitting anyway. ( and i have a set of mint tires I would like to use up )
When pay day rolls around I will be ordering stainless front brake lines & caliper rebuild set
So to those of you wanting to do a brake upgrade on something with the 100mm spacing, Z31 5 stud hubs are what you need.
Same result as getting R31 4 stud hubs re drilled but the Z31 hubs are reasonably easy to find
Re: James 85 Z31 300zx
Posted: Wed Aug 04, 2010 3:09 pm
by DJZ
What calipers are you and will you have to space them out? I think the offset was really wrong for the rotors when I tried GTS-t rotors & calipers, Z31 hubs with R31 struts they were nowhere near.