Page 2 of 6
Re: Asher's 280ZX
Posted: Sat Jan 23, 2016 6:00 pm
by DJZ
This is a chassis punch, they're the best thing for putting big holes thinner metals, these ones are good for up to 3.2mm steel. They also make oval, rectangle and square punches too.
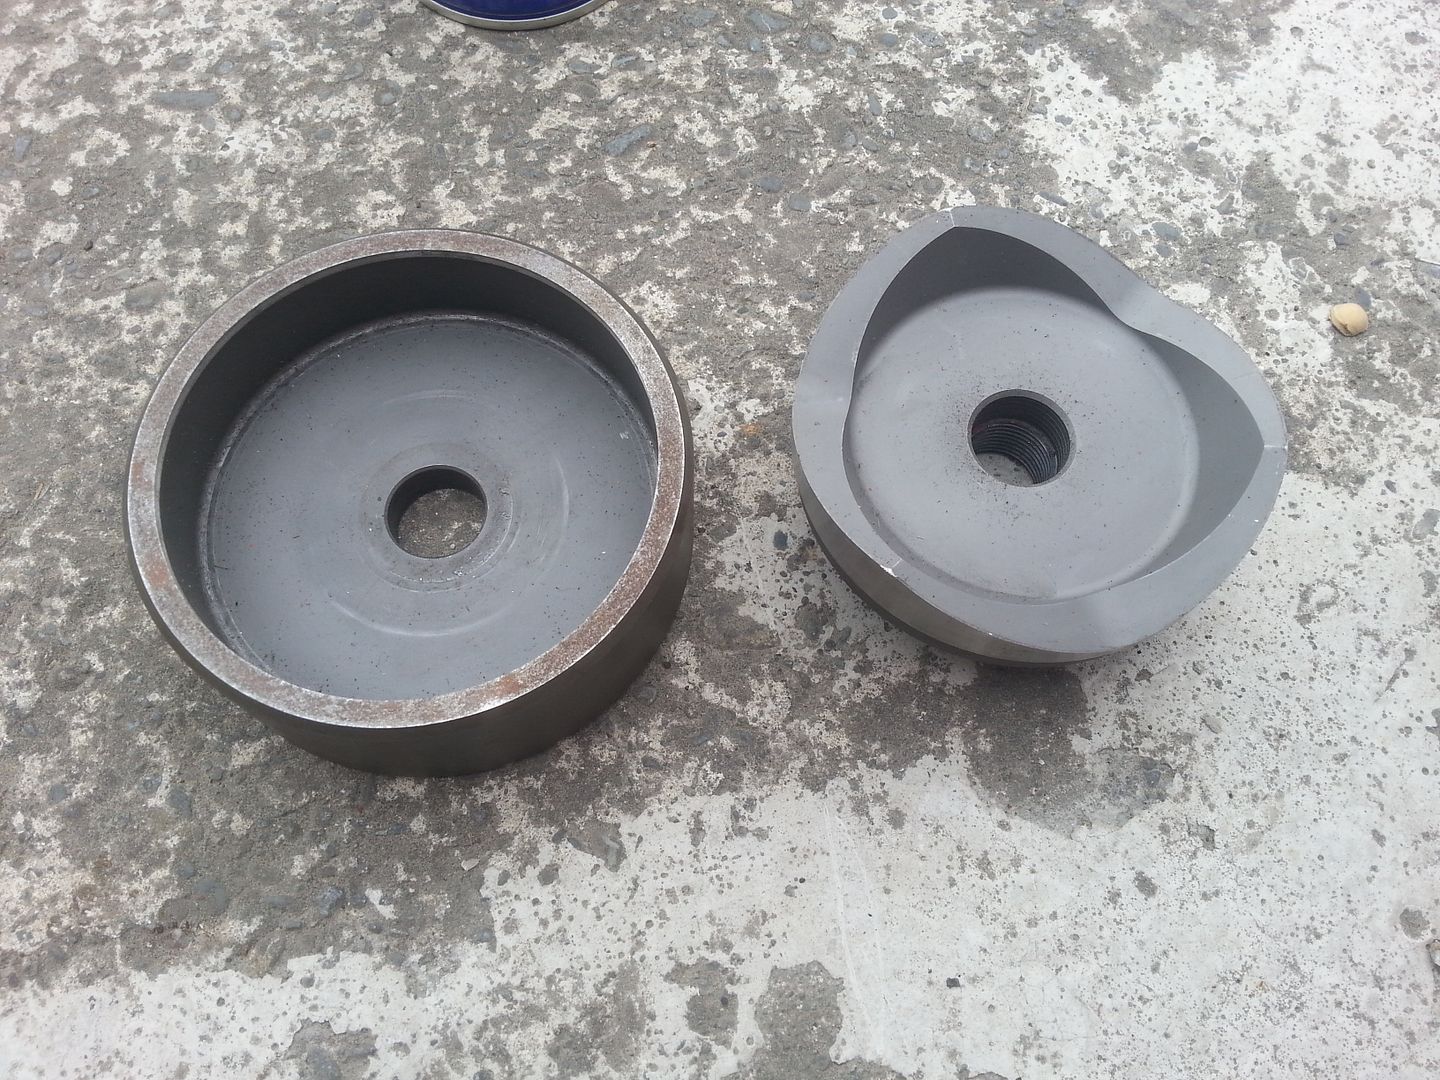
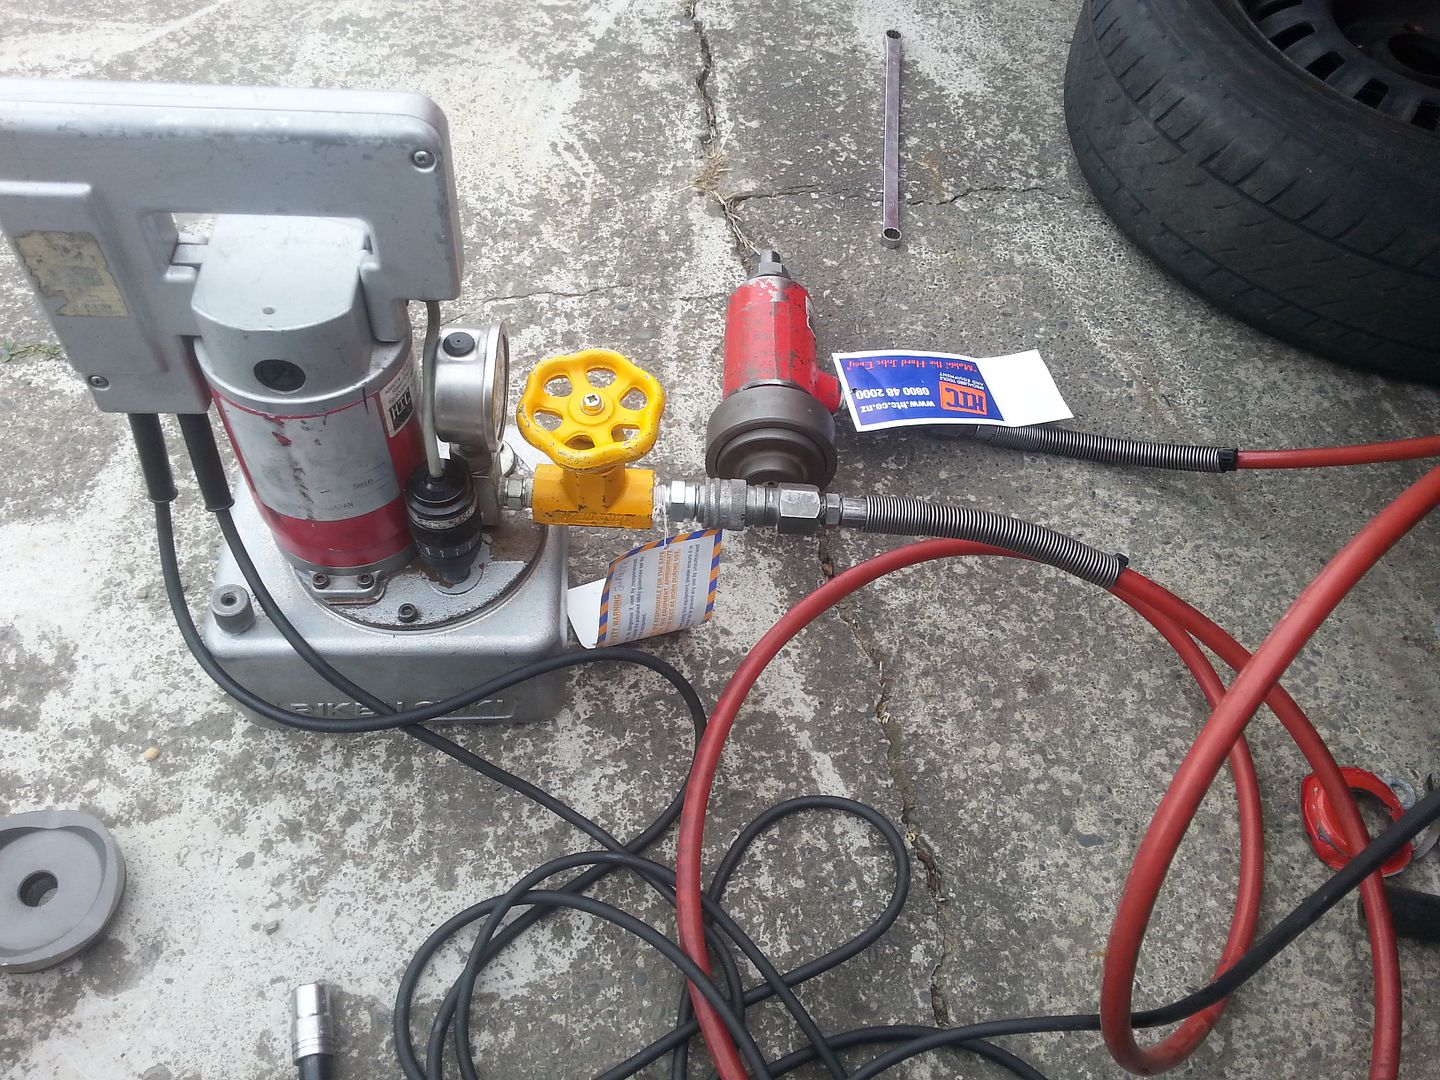
You can use the punches manually with a bolt (preferable with a bearing on it) but the fastest/easiest way is to use a pump and a hollow hydraulic ram like this:
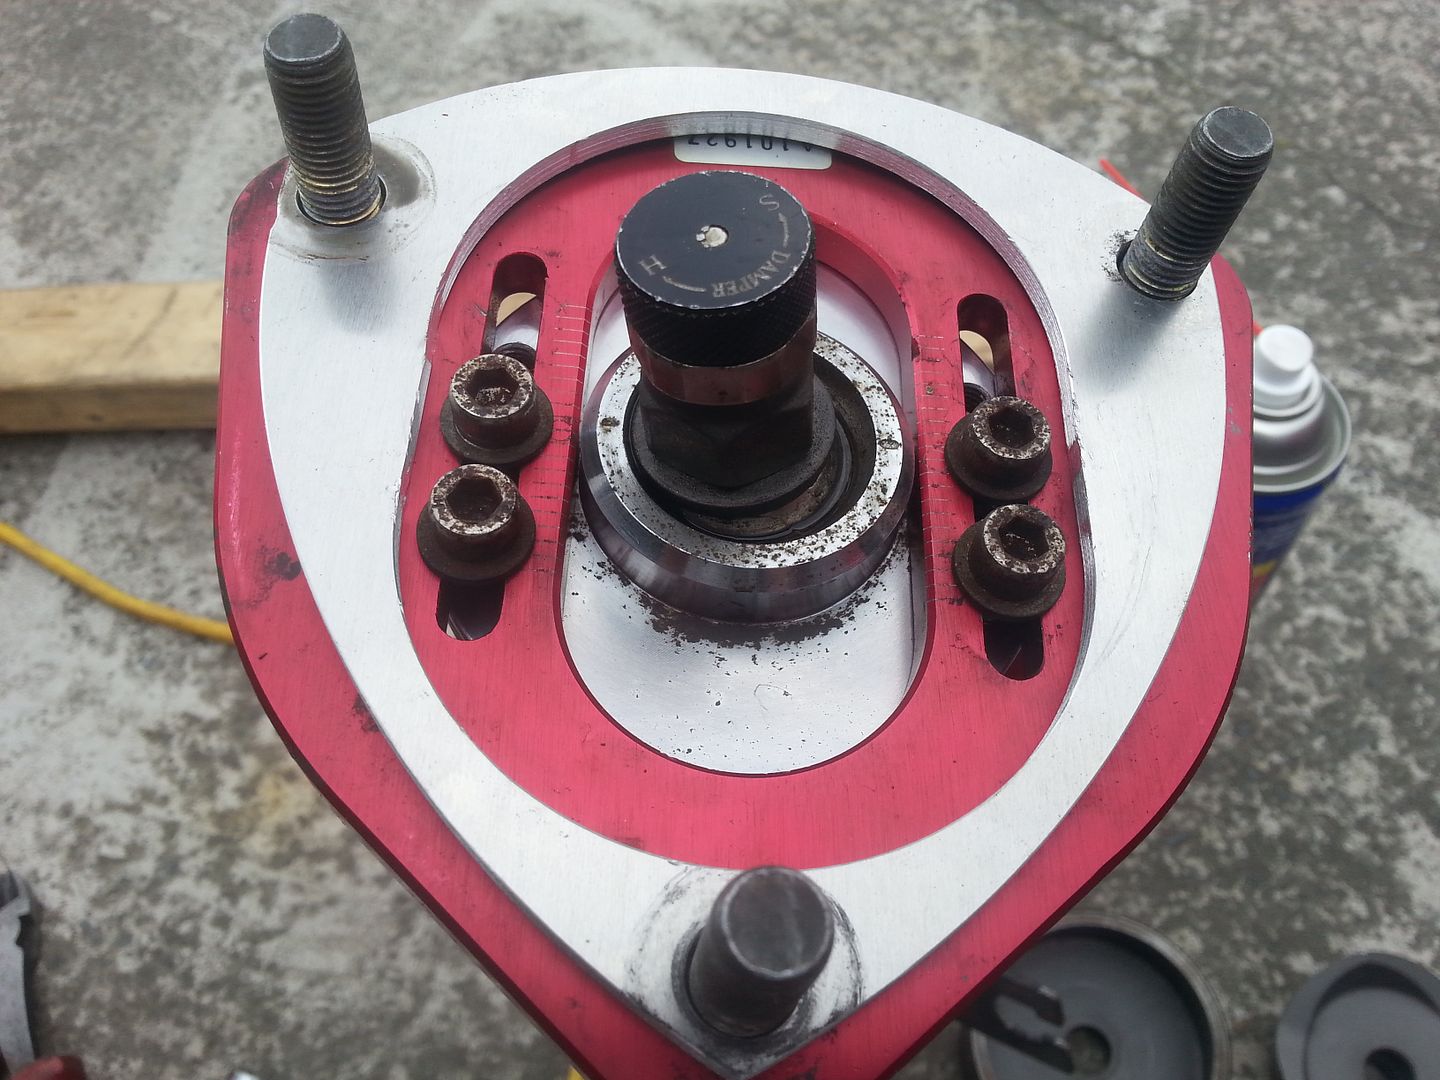
Made up a template so that I can get the hole straight and have it the same on both sides, I winged it when doing my car and the holes are slightly on the piss:
Slotted hole:
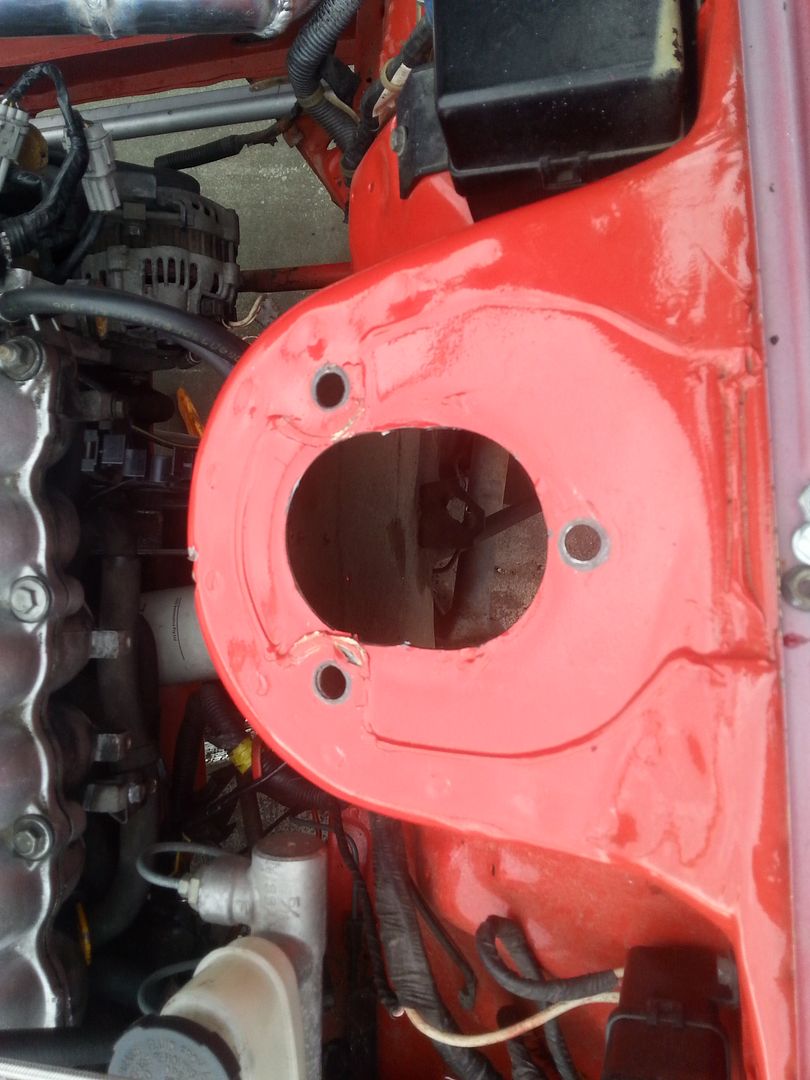
Material removed:
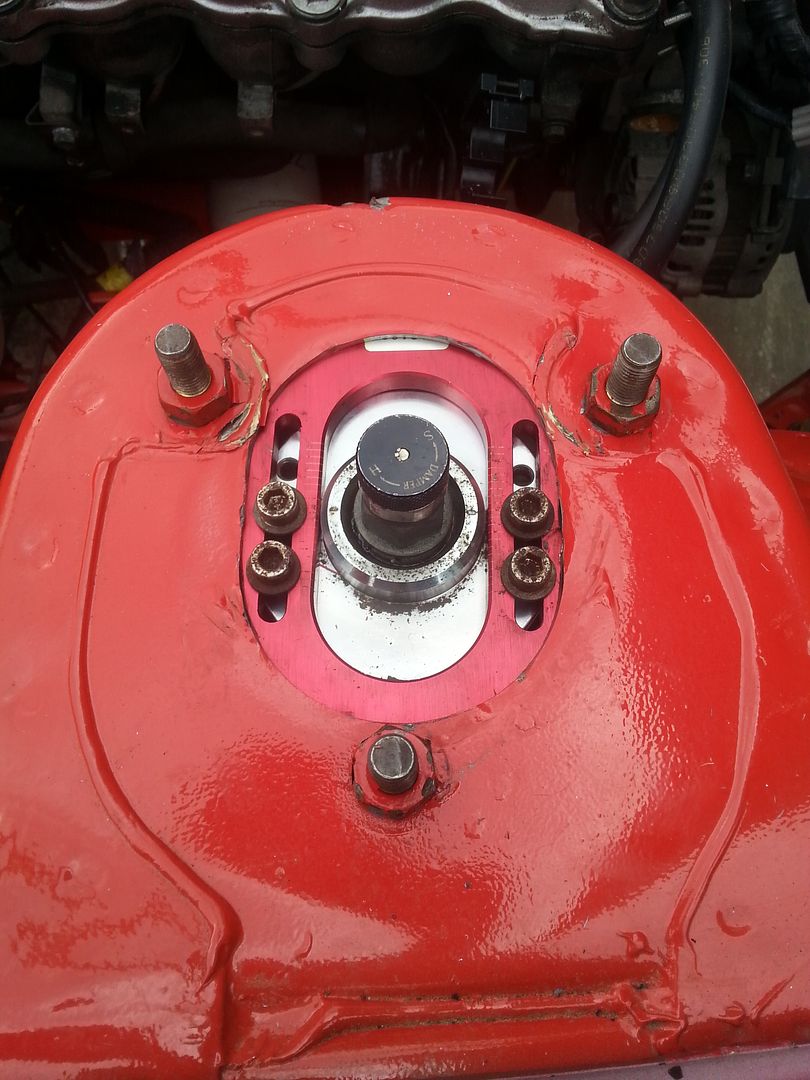
Camber plate installed:
Re: Asher's 280ZX
Posted: Sat Jan 23, 2016 7:00 pm
by 2 doors
Chassis punch for the win, I have a set but they really are for thinner sheet, and are Armstrong powered, those look great.
Re: Asher's 280ZX
Posted: Mon Jan 25, 2016 8:16 pm
by Bartman
Very tidy!
Looks factory.
Re: Asher's 280ZX
Posted: Tue Jan 26, 2016 7:47 am
by tlssunny
looks much easier and nicer than a file or a die grinder!!!
Re: Asher's 280ZX
Posted: Wed Jan 27, 2016 10:33 pm
by DJZ
Went to see Don Hoff today, he is happy with the ball joint adaptor but says it will need to go to the Technical Advisory Committee which doesn't sound too hard, I'll have a look in the next couple of days at what the involves, need to finalise the drawing for it before I can submit it.
Re: Asher's 280ZX
Posted: Sat Feb 06, 2016 7:28 pm
by DJZ
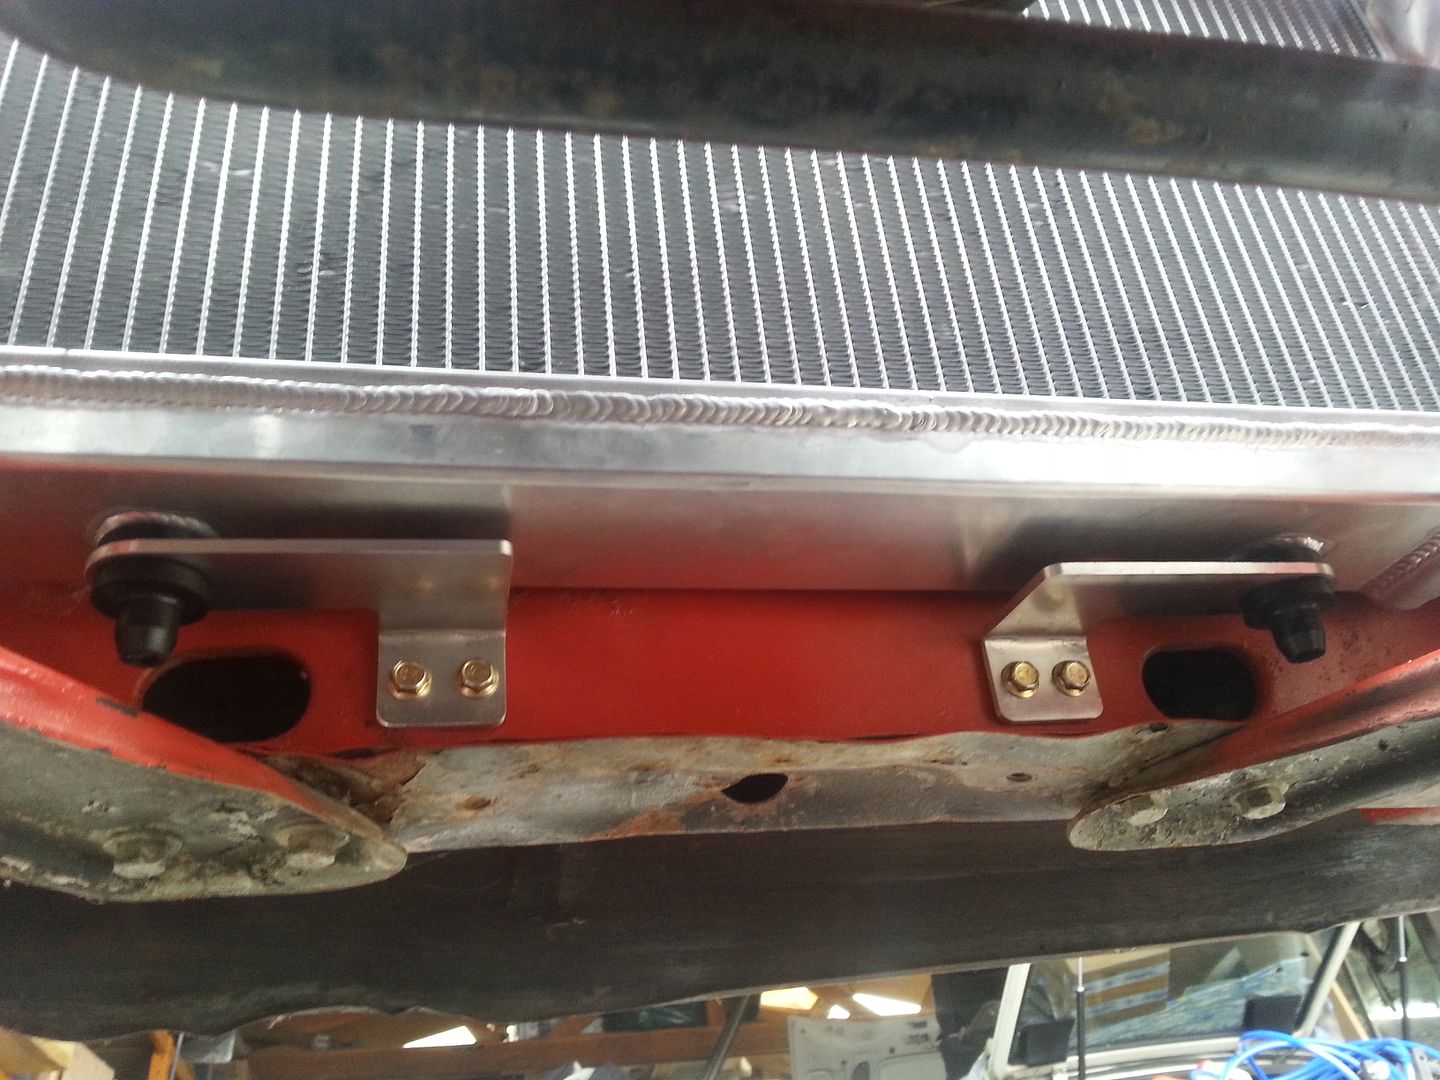
Made up some lower radiator mounts today, with my car I welded tubes to the radius rod mounts for the radiator to sit in but this time I wanted to use the original mount bushes. They would have been better out of 5mm ali, I thought I had some but it turns out I only had 4mm and 6mm, 6mm was too thick so they ended up being 4mm. If they aren't sturdy enough I might gusset them or make some out of 5mm but I have a feeling the radiator support is going to bend before the mounts.
Re: Asher's 280ZX
Posted: Sun Feb 07, 2016 1:59 pm
by DJZ
Ugg, every time I touch something it either needs something else or something is wrong.
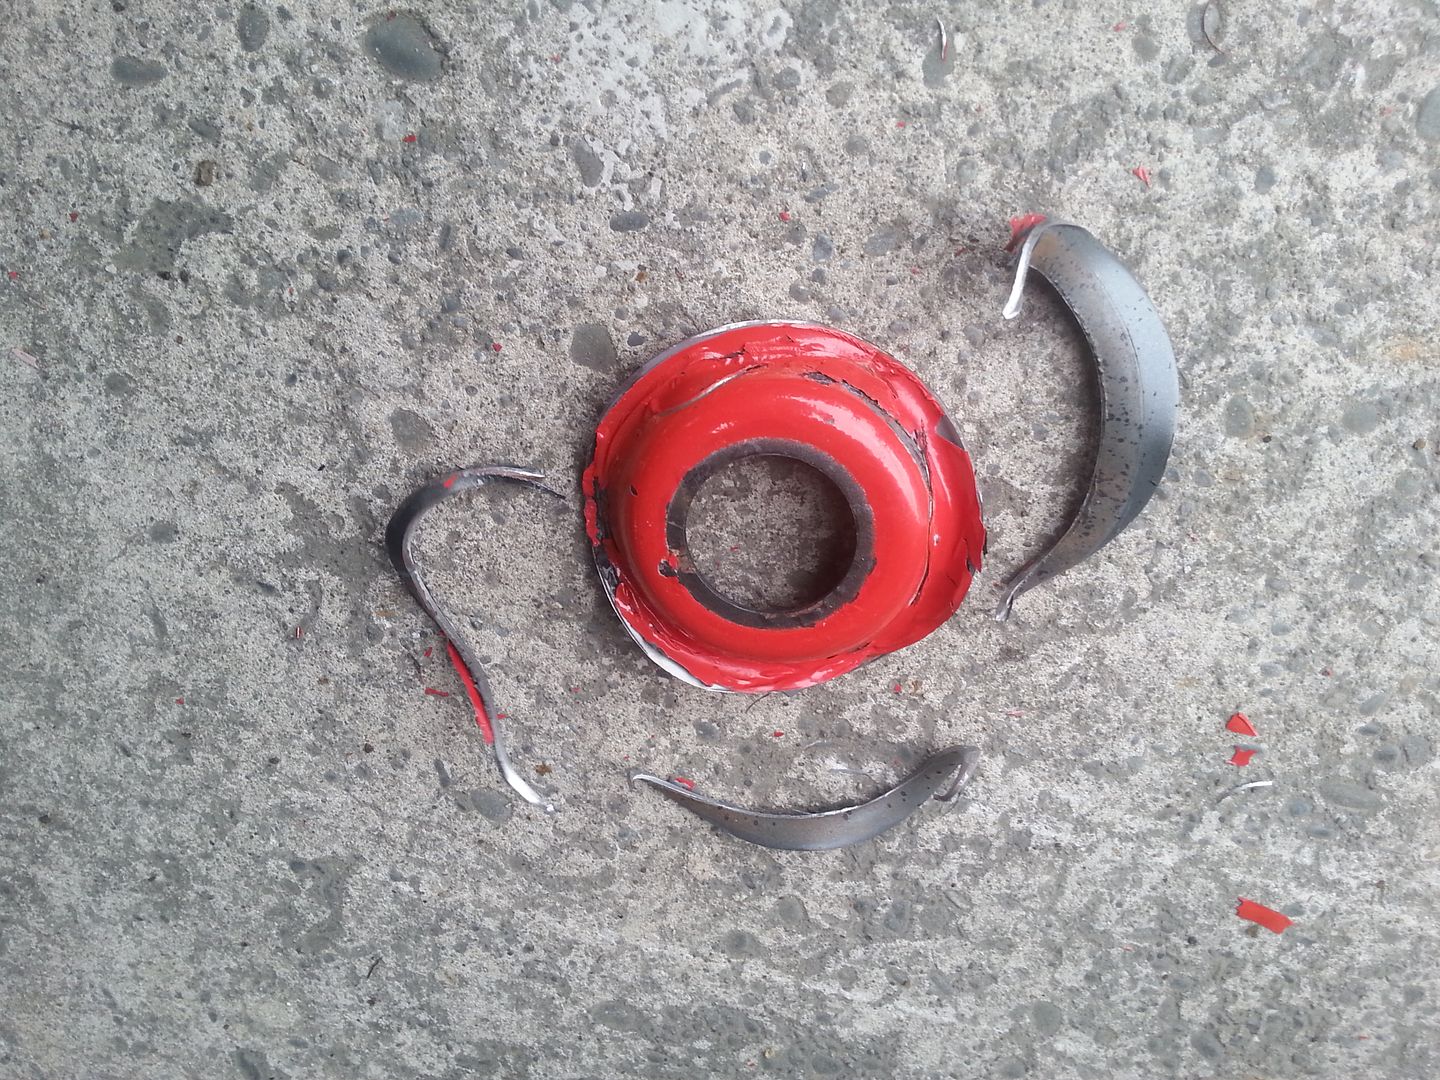
Put the radiator hoses on today and filled up the cooling system for the first time and water starts pissing out of the front of the motor, looks like it needs a new water pump.
Take the CAS off, take the top cover off and notice the CAS bracket is moving, think to myself it must have loose bolts.

Nope! Must have had a smack in the front of the motor at some stage, it's actually lucky the water pump was leaking or I might not have found this.
Also took the high pressure power steering hose off the black car to fit to this, I want to get a braided one for my car instead.
Re: Asher's 280ZX
Posted: Sun Feb 07, 2016 3:56 pm
by broke
I highly recommend not using a braided PS hose. Apparently the reason power steer hose has no wire in it is that some sort of resonance can get transferred through the wire.
Also the pressure hose usually has a length of restrictor stuff inside it that causes awful groaning noises and other issues if you remove it. Yes, I did learn that the hard way....
Re: Asher's 280ZX
Posted: Mon Feb 22, 2016 12:23 pm
by DJZ
Changed the cam belt, water pump, cam and crank seals, tensioner and idler. Refitted and refilled the radiator with no leaks this time.
Finished off the power steering hoses, made a new return line back to the reservoir using part of the original Z line from the rack, a new aluminium line that I bent up and flared and the original rubber hose from whatever car the donor reservoir was from.
Re: Asher's 280ZX
Posted: Mon Feb 22, 2016 11:15 pm
by DJZ
I ended up getting the 12mm steel for the ball joint adaptors cut out to a rectangle shape with a rounded end by Steel and Tube. Bent them in the small press at work today to the 20 degree angle that I measured off the original control arm, took about 9 tons to get them to where I wanted.
Drilled out the ball joint hole to 40mm with a rotabroach cutter (the mill didn't like this very much) then used an end mill to open it up to 41mm. I've started on the other end and have drilled the holes out to 8.5mm ready to tap to 10x1.25mm (yes the predrill size is slightly small but it's all I've got) and started to rough out the shape around the bolt holes but it was getting pretty noisy for this time of night so I'll finish it up tomorrow.
Started filling out the paperwork for the TAC, it's quite in depth and I don't/won't have all the information I need (like the shock absorber angle) until I actually finish one of the adaptors and can put the car on a ramp to simulate it being on the ground.